Virtual box is a free open source to install the secondary operating system on your device and due to this there is no effect for your personal files and folder and there is no issue of failure operating system which you have to installed on your device.
Before Processed this Part 2 installation you must need to complete Part 1 installation So If you not visit the installation of windows 7 operating system in the virtual box part 1 Click here
PART - 2 : WINDOWS 7 INSTALLATION
In Part 1 we are set up the recommended settings like C - drive space, Ram space, and operating system installation location to install windows 7 operating system on virtual box So After that in this section we are going to install windows 7 operating system on virtual box so before that please make sure you must have windows 7 operating system in ISO format.
➽ If you don't have windows 7 operating system in ISO format please Click here to know how to convert windows 7 operating system setup files into ISO format.
Follow the steps:
➤ Now click on Start on Left side top in virtual box
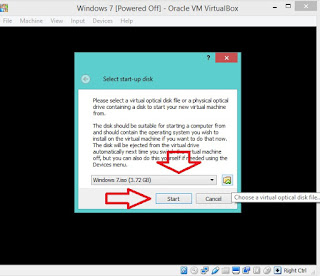
➤ Now Click on Folder Icon to select windows 7 operating system which is in Windows 7 . ISO format on your device and Click on Start
➤ Now Windows 7 screen appears in that verify your language, and keyboard layout and Click on Next
➤ Now Click on Install and wait until the next screen appears
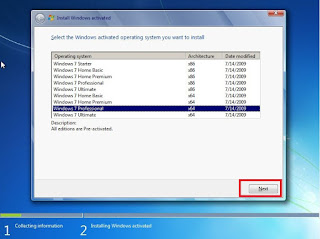
➤ Now select your required windows 7 version like windows Home x86 (32-Bit) or Windows 7 Professional x64 (64 - bit ) Ex : Windows 7 Professional x64 (64 -bit) and click on Next
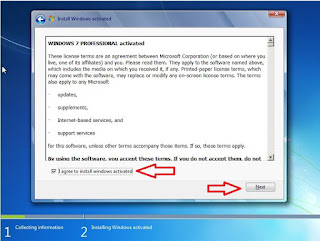
➤ Now check the box: I agree to install windows and click on Next
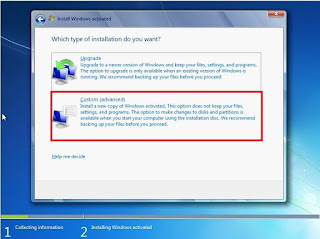
➤ Now Click on Custom (Advanced) Box
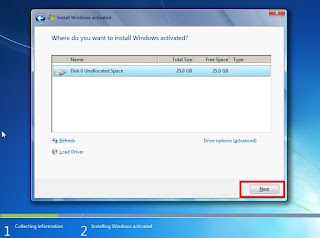
➤ Now Click on Next
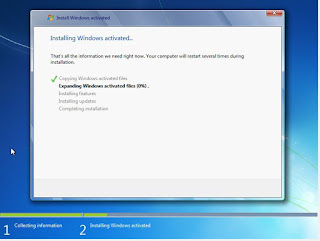
➤ Now the process of copying files and installation starts and wait until to complete the process and these may take several minutes based on your system performance
➤ In the Installation process, the virtual system (not your device) may restart several times so don't do anything or don't press any key if it asks " Press any key to boot from CD or DVD" because these make the process of installation to the beginning.
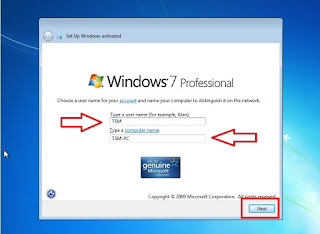
➤ Copying of files completed window appears to give a name so in that type your name or any other as per your wish (Ex: TSM) and Click on Next
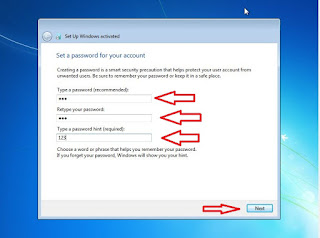
➤ Now type the Password and click Next if you want otherwise Click on Next
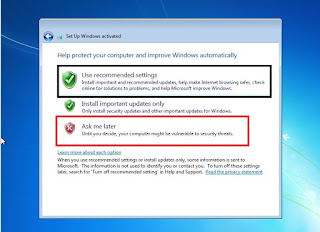
➤ Now if you're using Genuine operating system ( windows 7) select Use recommended settings otherwise choose to Ask me Later
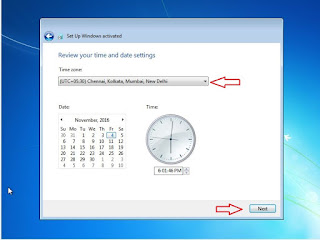
➤ Now select a Timezone: (UTC+ 05:30: Chennai, Kolkata, New Delhi) and Click on Next
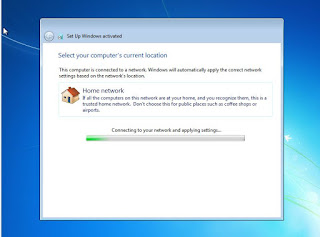
➤ Now select a network either Home or Private or Public and Click on Next
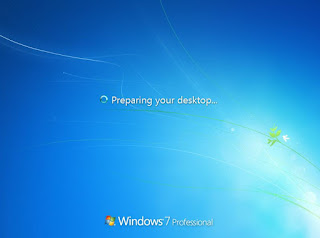
➤ Now Preparing your desktop for the first-time screen appears
➤ After all, these your Windows 7 Desktop appears
➤ Now Open Computer and Right - Click on DVD Drive and Select Eject to avoid Press any Key to boot from CD or DVD message on windows Startup
➽ Note: f your virtual box Operating system screen not showing as per device resolution (Full Screen) or showing like below image
➤ In that case, you need to install a Guest additional CD Image.
➤ To Know How to install Guest additional CD Image Click Here
That's Completed







No comments:
Post a Comment